This post is part of our series on How we built an Internet of Things based M&M Sorter using Lego. See the overarching blog here.

Computer Vision is really cool, the idea of a computer being able to “see” is fascinating not just for tech heads like me but for everyone I speak to about it! I’m especially excited when I actually get to play with cool new technology and actually show non-tech friends a practical example of what I have built. Beats out the other times I’ve talked about my work, I learnt the hard way that showing off logs from a blockchain isn’t all that exciting.

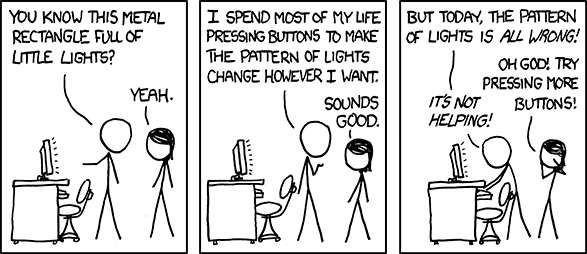
Randall Munroe tist:

When it comes to computer vision, however, showing how a facial expression detector algorithm or a self-driving car works means my friends can get just as excited as I am. So when I heard we were developing an IoT device to sort M&M’s at Sheda I got really excited to help, jumping on the project to develop the computer vision algorithm to sort M&Ms.

To get a proof of concept up, we decided to use object detection using OpenCV(Open Source Computer Vision) with colour filtering on a Raspberry Pi. In this post, I will go through the technical details on how I set that up.

To follow along with this you will need a Raspberry Pi with a camera module, however, if you don’t have that you can follow along with any computer with a webcam.

Contents

  • Set up Raspberry Pi with OpenCV
  • Develop an algorithm for filtering colours and detecting the contours of an object using OpenCV
Sheda uses design and emerging technologies like A.I and blockchain to solve complex problems that make and accelerate impact and bring about postive social change.

Set up Raspberry Pi with OpenCV

Setting up a Raspberry Pi does take a little bit of time, it took me about two hours all up to set up and be able to start playing with OpenCV.

https://www.raspberrypi.org/magpi/wp-content/uploads/2017/08/Pi-3-Grass.jpg

The first step is to install all of the dependencies required for OpenCV

CODE: https://gist.github.com/lachlanagnew/8f1f7c149963ef09b39ca104de40cabb.js

Compiling OpenCV

Next step is to compile OpenCV on your device. The first part of this is to download and un-zip the OpenCV files.

CODE: https://gist.github.com/lachlanagnew/cba25b1d197c8a849d8072a1731494a0.js

Setup Python Environment

Next, we’ll set up our Python environment by installing pip and virtual env. Using a virtual environment ensures that package dependencies don’t clash while installing OpenCV.
You can read up more on this at — https://realpython.com/blog/python/python-virtual-environments-a-primer/

CODE: https://gist.github.com/lachlanagnew/3d538568ca078fd2356dc618c734b3d2.js

Next, we have to update our ~/.profile file with vim, nano, or your favourite text editor to include the following lines at the bottom of the file:

CODE: https://gist.github.com/lachlanagnew/5a0c23bfe99e2189c69c42031b818c34.js

Then to make these changes take effect:

CODE: https://gist.github.com/lachlanagnew/3fc0e9fd5e5c8649273e92b26d6bc5c5.js

Next, let’s create the Python virtual environment for compiling OpenCV in. The following command will create one called cv\

CODE: https://gist.github.com/lachlanagnew/7f547ba389ddb9d15812d3d8b77bca41.js

To make sure that we are in this virtual environment there should be a (cv) preceding your prompt.

If you don’t, you can run the following commands to work in the environment:

CODE: https://gist.github.com/lachlanagnew/df9dad05c93a18b65efc01125ccccf81.js

Assuming you are now working in the cv virtual environment, you’ll need to install NumPy as a dependency. This might take about 10 minutes on a Raspberry Pi, so it may look like the install has hung but if you just let it run it should finish, remember a Raspberry Pi is much slower than your computer.

CODE: https://gist.github.com/lachlanagnew/c15d4081e0bde80094f3227d2f778b6f.js

After that is finished, double check you are still in the cv virtualenv and if not run the previous command shown above.

Once we are in the cv environment, let’s set up our build.

CODE: https://gist.github.com/lachlanagnew/853752b971dbddb78662fc0f18d93a41.js

On the output screen, make sure you scroll down to where it states the python version you are using and make ensure that cv is in the path name.

You can start compiling the library, the make command does this, j4 tells make to utilize all 4 cores.

CODE: https://gist.github.com/lachlanagnew/af295d0a939610e2af2893c7e6fcf5a3.js

If you have any issues when compiling on all four cores you can go down to 1.

**NOTE: BE CAREFUL**

Running make clean command will clear your compiled files which might have taken a while so only run this if needed.

CODE: https://gist.github.com/lachlanagnew/a597adf5878e62484121c836d2ec724e.js

From my experience, it takes about an hour and a half to complete so just sit back and wait for that to finish before you continue. Or….

xkcd.com: Compiling artist: Randall Munroe

Once it is finished compiling, install Open CV.

CODE: https://gist.github.com/lachlanagnew/e6c6c1bfdf57e32068e6e3c0d662edf0.js

After running make install , your OpenCV + Python bindings should be installed in /usr/local/lib/python3.5/site-packages . You can verify this with the ls command and then move the output to global packages:

CODE: https://gist.github.com/lachlanagnew/569da323e274b6e3ee1836deb7e26aa5.js

We can now confirm that it is installed:

CODE: https://gist.github.com/lachlanagnew/40a28e12d006e8c7f83b23fe63f841a3.js

If you can verify OpenCV is installed by importing and printing the cv2 version then you can go ahead and delete the files we downloaded from your Raspberry Pi:

CODE: https://gist.github.com/lachlanagnew/3d3fdeda3112de5f03f8575405dbe578.js

Develop an algorithm for filtering colours and detecting the contours of an object using OpenCV

Now that we have OpenCV installed you can enable the Raspberry Pi’s camera:

CODE: https://gist.github.com/lachlanagnew/ac25714513a2f77bcf35a3cf56d15485.js

also, ensure that the NumPy module is installed:

CODE: https://gist.github.com/lachlanagnew/da9cbab4025fac90814b7678b4620e4e.js

Perfect, we are now officially all set up to start developing our colour detection algorithm.

For this example, we are using colour filtering to sort M&M’s by colour.
To achieve this with OpenCV we will use the HSV colour space. The HSV colour space is widely used in computer vision due to its ability to separate images via colour even when shadows are being cast.

A bit of background on colour spaces:

RGB: which is a colour space that’s widely used, splits images into three colour channels: Red, Green, and Blue. This is all well and good when trying to represent an image on a screen as most screen displays use RBG or something close to representing an image to a screen. However, RGB has limited capacity to detect and distinguish an image based on a colour range, it can be hard to get specifics on an image of an object shown in different environments or conditions. For example, when shadows are being cast or bring lights are on an object it can change the specific colour channel you are trying to zone in on and results in poor detection of the object’s colour e.g. red can be detected as orange.

HSV: This colour space consists of splitting an image into to three channels as well, but these three channels are Hue (Colour Shade), Value (“Brightness”: how far off of black it is), and Saturation (How “colourful” the image is). This puts us in a better position when we are trying to sort via a colour range, as the shade of the given object can be in one channel. Using HSV as our colour space allows for a better chance of consistent colour detection as the shade of a particular object usually doesn’t change when an object is exposed to different kinds of light. This allows us to specify a colour range just based on the shade of the object and our algorithm should be able to detect it in any lighting or environment.

https://www.slideshare.net/michelalves/about-perception-and-hue-histograms-in-hsv-spaceSource:

Using OpenCV to detect colour ranges

CODE: https://gist.github.com/lachlanagnew/ee15aa83b25b026505c17fc0bb2d9b5d.js

With OpenCV we can filter out an image using colour ranges, meaning, if we give OpenCV two colours or a colour range, it will blackout (effectively ignore) the image when it is not between the input colours in the HSV spectrum. This allows us to give a max hue and min hue value for an object, OpenCV will filter out anything that isn’t in that range, blocking out other objects.

Although OpenCV will be able to detect the object in any lighting with just the hue, there is a possibility of also detecting other objects in the background with a similar colour. To prevent this, I suggest lightly tweaking the saturation and hue values to match your object as closely as possible, this will give you the ability to focus in on just the object you want to detect.

We can fine-tune the processed images by using OpenCV’s erode and dilatefunctions. The erode function takes away any small points on screen from the image while the dilate function will take any remaining points on the screen and expand their size slightly. This will help reduce noise and increase the size of the object wanting to be detected.

CODE: https://gist.github.com/lachlanagnew/d2640f7f256a809bdc702cc499aa99c9.js

Detection

Source: http://prostheticknowledge.tumblr.com/post/167868808201/a-computer-vision-systems-walk-through-times

So now we know how the colour filtering works in OpenCV but all that we’ve done so far is the ability to filter out an image via a colour. In order to get our RaspberryPi to detect an M&M’s colour using a camera, we’ll also need to take into consideration the size and outline or shape (in our case a spherical object) of the object you want to detect.

For this we use OpenCV contour:

Contours can be explained simply as a curve joining all the continuous points (along the boundary), having same color or intensity. The contours are a useful tool for shape analysis and object detection and recognition.

Contours are useful because they give us the ability to not only have an image with a colour range detected but also be able to show a clear outline of the detected object assuming we calibrated correctly.

CODE: https://gist.github.com/lachlanagnew/264e1c3a31141efa374717c03bad5c25.js

Looking at the code above, I use the contours function to find objects that match the colour range we want to detect, I then looped through each contour and use OpenCV’s minEnclosingCircle function to get a circle with a centre and radius of the contours. I used this to filter circles with a minimum radius length, this allows us to filter out any random noise in the image and can focus our object.

If an object has a radius size that matches our expected length, I draw a circle on top of the original image to highlight what object got detected on the video displayed on a screen and call an objectFound function.

The outline and code above give a foundation of how the colour detection will work. To get this working in real time, I cleaned up the code a little bit and use a loop with the image detection code to work with video. What we end up with is close to the script below which loops through every video frame to detect the M&M’s colour in real time.

CODE: https://gist.github.com/lachlanagnew/7828b5c26e821af7332f8c125fe51339.js

When we run this on a Raspberry Pi it displays a screen like this:

In this example, I have set the colour range to detect blue M&M’s which as you can see in the GIF above it finds the blue M&M, draws a green circle around it and prints “found” in the output.

This was quite a bit of fun creating this demo and probably ate more crunchy M&Ms than any human should consume in a lifetime.

OpenCV made the hard work and calculations needed for computer vision and image processing somewhat easier, mainly it decreased the learning curve dramatically.

Check out the full blog on how we used this algorithm and an M&M sorter made out of Lego to sort M&Ms in real time based on their colour.

All in all, this was a very fun project,

If you enjoyed this…

and are interested in Computer Vision or looking into developing an IoT or an intelligent software product with machine vision or OpenCV get in touch at hello@sheda.ltd.

Would love to help you explore how you can use A.I and computer vision to increase the impact of your business activities.

By

Lachi Agnew

Software Developer
@ Sheda
You might like this
No items found.
Back to

Call us

Call +61 3 9028 6936

Drop in and say hi

3/16 Honeysuckle Dr,
Newcastle NSW 2300
get directions

Follow us

Contact

Thank you! Your submission has been received!

Hmm... Something's not right. Try submitting again.